• Skip to primary navigation
  • Skip to main content

Pine Grove Lighting

  • Buying Guides
  • Styles & Trends
    • Ceiling Fans
    • Bathroom Lights
    • Ceiling Lights
    • Lamps
    • LED Lights
    • Outdoor Lights
    • Smart Lights
    • Wall Lights
  • Wellness & Safety
  • Shop Products

Ceiling Lights

Upgrading Your Lighting on a Budget

Upgrading Your Lighting on a Budget

by admin · Mar 13, 2023

All the Tips, Tricks, and Secrets You Need to Make Your House Shine on a Dime

If it’s been a while since you redecorated, your current home decor probably isn’t speaking to you anymore. When you’re short on time, updating the lighting is one of the fastest ways to make your home look, well, brighter. But, when you’re on a budget, replacing everything in the house just isn’t the right call. The good news is – you don’t have to! Here’s a few easy, creative, and budget-friendly ways to make your home feel bigger and brighter… without breaking the bank.

1. Swap Your Light Bulbs

Many people blame an old fixture for their lighting woes, when really it’s the bulbs to blame. Try swapping out your old bulbs with a fresh set of brighter LED bulbs!

While LED lights may cost more upfront, they use at least 75% less energy – which means they can give off more light and use less power. They also last up to 25 times longer than traditional light bulbs, so they’ll last for years before they need to be replaced. 

2. Do it Yourself

The cost of lighting installation can eat away at your budget quickly, but it can reduced if you’re willing to do a little research and put in some work. Installing lighting yourself can give you some extra cash to get lights you love.

Before tearing out any fixtures, educate yourself on the proper safety precautions! If you’re unsure about doing it yourself, don’t forget to budget for the professional help you’ll want!

3. New Shades, New Me

If your light fixture comes with shades – whether they’re glass, fabric, or metal – you might be in luck! Did you know you can replace the shades or globes on most fixtures that have them? A new set of shades is WAY cheaper than buying an entirely new light fixture, and it will make just about any fixture feel brand new again! With a like-new fixture, your space will match your style, leaving you (and your wallet) feeling happier.

4. Refinish Your Fixture

Another alternative solution to buying a new light is changing the finish of your existing fixture. With a little rub n’ buff and a handy youtube tutorial, your light will look totally different! This may need some touching up down the road, but when you need a quick fix to get you by until you can invest in a higher-quality fixture, a little DIY magic can help stretch your money. A little finish can take your fixture from outdated to updated while keeping your budget happy. 
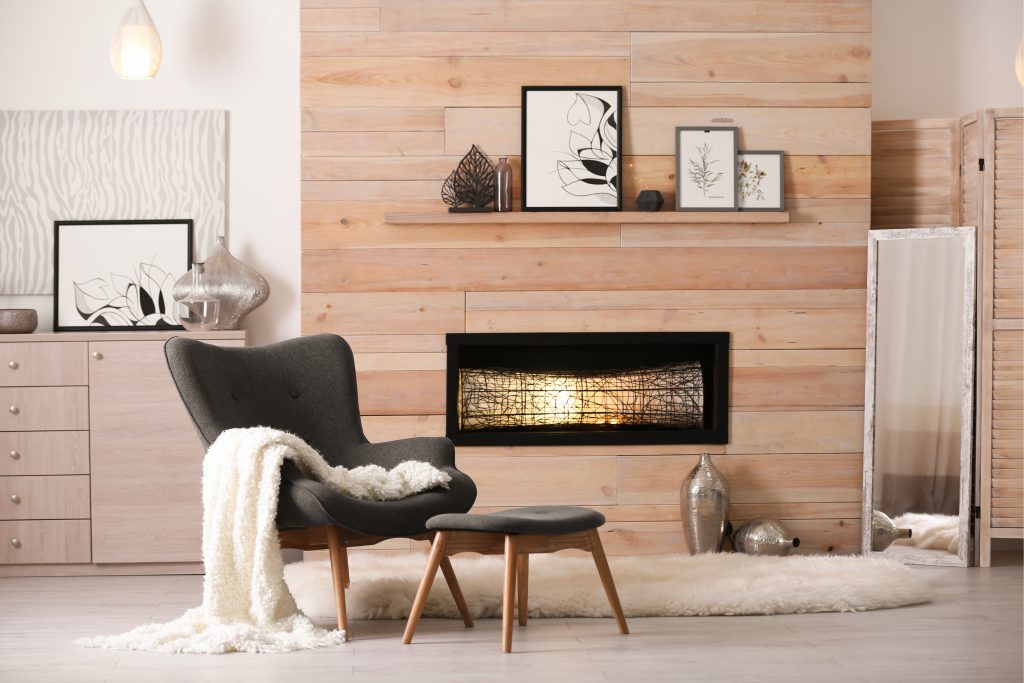
5. Mirror, Mirror

In our opinion, quality lighting makes the biggest difference in a home, but adding mirrors can also increase light–if they’re well-placed. Hanging a mirror near a light or window can help reflect light, making the space look brighter and bigger. That reflected light can go a long way in lighting up a dim room!

6. Focal Point Focus

Another way to make your space look upscale is picking a more expensive light to be a focal point, while adding other less spendy lights to light up the room. The eye will be drawn to the focal point and won’t notice anything else! To start, install a chandelier to draw attention away from any existing recessed lights. Throw in a floor lamp where you need some extra lighting and–voilà! Your eye will be drawn to the chandelier, but the room will still be beautifully lit.

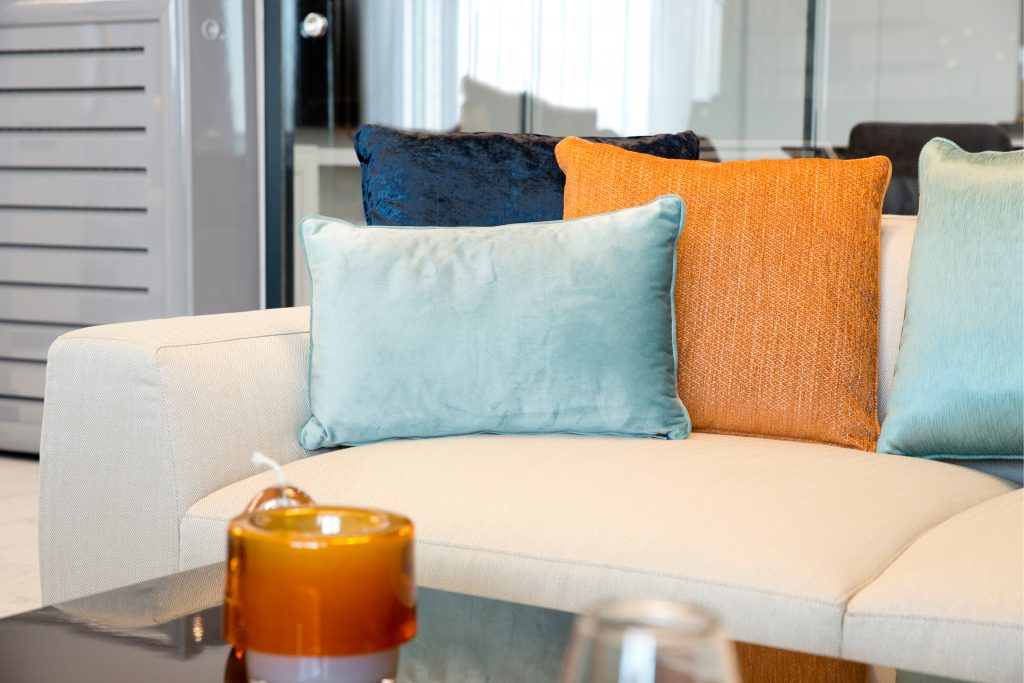
7. Add Lamps, Lamps, and more Lamps!

When in doubt, add a lamp! They’re cheaper, require little to no installation, and are a great design piece. Tabletop lamps make great decor for your tablescape and can light up a workspace. Floor lamps create a homey conversation area in a living room. Lamps are a super versatile, budget-friendly option to give just the touch of light you need.

—

We know that when you’re on a budget, every penny you spend matters! To be sure you’re spending all of them wisely, give us a call! We’ll match you with the best lighting solution for your budget and save you money so that you can get lights you love.

Filed Under: 2023, Bulbs, Buying Guides, Ceiling Lights, Lamps, Light Bulbs, Mirrors, Styles and Trends, Wellness & Safety

Gorgeous Nature-Inspired Rooms You’ll Want to Escape To Immediately

Gorgeous Nature-Inspired Rooms You’ll Want to Escape To Immediately

by admin · Mar 11, 2023

When you’re designing your house, finding inspiration is key. Taking a step outside can give you a fresh perspective – there’s no better inspiration than mother nature herself!  No matter what space you’re working on, drawing from the beauty of nature will make your home feel like paradise.

The combination of earth tones and natural materials in these rooms almost makes them feel more like they should be in National Geographic than a home decor magazine – and we mean that in the very best way possible. 

Bathrooms

Picture yourself after a long day of work. You’re exhausted, and what you need more than anything is a moment to yourself. You finally get some uninterrupted time to sit in the warmth of the tub and it feels good. The anxiety melts away. Your bathroom can be a natural refuge from your stress. When you put a little effort into your bathroom, it’ll pay off!

The owner of this room has a green thumb that brings the whole room to life. To complement the plants, they chose a macrame chandelier that’s uniquely fitted for this bathroom. Warm wood and wicker also feel right at home in this organic space. The black furniture and tub ground the look, bringing an effortless cohesiveness. You’d have a hard time feeling anything but relaxed here.

This light and airy space incorporates natural materials like wicker and terracotta pots. The foolproof combination of warm wood tones, green plants, and neutral, natural colors will always leave you feeling like you’re stepping into an oasis! This room is definitely a no-interruption zone.

If it was possible (or ethical) to steal a bathtub, we’d be walking out of this bathroom hauling this one! The wood exterior is a nature enthusiast’s dream base for relaxation. The twinkling lights behind it are also a charming touch to give the bath a glow. 

Living Rooms

The living room is the main hub of the house. It’s where work, relax, and entertain guests – you live here. Whether you choose a paired back approach or go full maximalist and pull out all the stops, make sure to include some natural materials to ground yourself and make the living room feel more like home.

Neutrals are the star of the show in this living room. We love the texture the pendant light brings and how it coordinates with the mirror frame and the accessories in the room. The color palette may be limited, but each piece works together to create a neutral haven where texture is the star of the show. 

This nature-inspired design would work well in a space of any size. When you’re strapped for square footage, picking a smaller couch that will still accommodate your needs is a smart choice. A pendant light also shows creativity since it won’t take up any extra floor space. It’ll give you the ambiance for an intimate conversation or some light for reading. The texture of the wicker and wood here is also stunning. Adding burnt orange brings a tiny pop of color to make you feel extra happy!

This colorful living room is oozing with style! Who said organic design has to be boring? We can’t help but feel insanely jealous of whoever owns this room. Everything here – the colors, textiles, plants, and warm wood furniture – is to die for. Don’t be afraid to go bold and bright if it makes you happy. This is a living room anyone would be lucky to come home to!

This living space uses nearly all natural materials and earth tones in its design to make a cozy conversation space. From the wood ceilings to the stone accents, the textures here are immaculate. Everything feels warm and welcoming. A wood ceiling fan matches all the decor and will give this homeowner an extra breeze on a hot summer day.

Bedrooms

The bedroom is the best place to be a little braver with your decor. It’s the place you should feel the most comfortable being yourself. Pick bolder earth tones and bring in all the natural materials to create a place that will allow you to be the best version of yourself!

This cozy room pulls out all the stops. The way the headboard coordinates with the gorgeous pendant lights has our jaws on the floor! They give the room a natural glow and highlight that warm orange wall. To some a deep, rich color like this can be intimidating, but this bedroom is the perfect example of what can happen when the risk pays off.  

Going dark on the paint can be risky, but using light, warm colors to contrast it is a clever way to combat any heaviness and create balance. The pendant above the bed is a gorgeous focal point that ties in with the wicker and wood. A fixture like this gives off soothing, soft lighting that helps to prepare yourself for a good night’s rest. 

If light and airy is more your speed, use this room as inspiration. Natural textiles bring layers of texture and interest to this bedroom that make it feel cozy and inviting. The rugs and layered blankets make this space feel lived-in without feeling cluttered. Sheer curtains allow for lots of diffused natural light for a dreamy daytime vibe, and will reflect just the right amount of light at night to create a relaxing and comfortable atmosphere.

Kitchens

No matter your kitchen’s current style, a few extra touches from nature can make it a gathering space where you’ll love to spend time preparing and sharing food with your loved ones. 

In a small space like this, details matter. The warmth in the butcher block counters and floating shelves stands out against the stark white of cabinets, creating a sense of balance without filling the space up with accessories. When space is small, a single bold choice is a great way to give it some personality – these mismatched pendants do just that! And of course, no nature-inspired space is complete without a little green. In a space full of hard lines, this pothos softens the edges just a little – and it’s perfect for the out-of-the way nook in kitchen since it won’t require much light. 

Going with darker textured cabinets was a bold move here. They almost look like they were carved straight from a mountain! In another space, they might look more industrial, but with the wicker pendant and basket, the white tiled backsplash, and the plants for accessories, it gives modern organic. The sharpness of the hard edges and metallic textures is softened by the natural textures and shapes throughout the space, like the draped pendant lighting – a smart choice that balances the design and makes it easier to see what you’re doing while you prep dinner.

This kitchen is a marriage of light and airy and organic design. The green styled cabinets are perfect for storing the most beautiful cookware and dishes. Adding fresh flowers makes a kitchen feel fresh and beautiful. However, the icing on this wedding cake is the lighting! Those cute white pendants and this kitchen are a match made in heaven. They fit the space perfectly and will give you some much-needed task lighting.

Nooks

Almost everyone has that spare corner in their home that they just can’t quite figure out what to do with. Adding a seating nook for reading or working one of our favorite tips to make a space feel cozy and welcoming. 

This little nook looks like Shangri-la in the middle of a house! Get cozy with a book and a blanket or just take a little rest here for some mid-day rejuvenation. Everything about this leans into the wildness of the natural world. Even the lighting is freeform and organic, these hanging pendants make this space feel like magic and will give you light to read no matter the time of day. 

This boho-coastal nook is just what the doctor ordered for some me-time. We love a good hammock – and this one is just begging to be relaxed in. The driftwood frame with the macrame hammock turns this space from an empty white corner into a light and airy refuge. The beaded chandelier is an unexpected twist that ties perfectly with the accessories, making this nook feel like it’s just a few steps away from the beach.

We can tell every element in this picture was chosen intentionally because it works together so well. From the wood and wicker furniture to a neutral color palette with a grounding green on the wall, you can’t get more organic than this! The dome desk lamp in white is a smart choice for task lighting – its small footprint doesn’t eat up work space, and the height and color make it pop against the dark wall behind it. This work nook may be small in size, but not in style. 

—

Using an earthy color palette and natural materials in your design is nothing short of gorgeous when it’s done well. We love this trend and want to help you create it in your home. Come visit Pine Grove Lighting and show us what inspires you. We’ll help you the find the perfect lighting solutions to create your own natural sanctuary.

Filed Under: 2023, Bathroom Lights, Bedroom Lighting, Buying Guides, Ceiling Fans, Ceiling Lights, Chandeliers, Kitchen Lighting, Styles and Trends, Wellness & Safety

How to Safely Replace A Ceiling Light

How to Safely Replace A Ceiling Light

by admin · Mar 5, 2023

Ceiling lights are a must-have feature in any room. Whether you don’t like the previous homeowner’s taste or you’re just ready for an update, ceiling lights can revitalize your home space. It may be even easier than you think–just follow these steps to safely switch out those old light fixtures for a new look.

What you’ll need:

  • Screwdriver
  • Step ladder
  • Voltage detector 

You may also need:

  • Wire cutters
  • Wire strippers
  • Pliers
  • Painter’s tape
  • An extra set of hands 

Part 1: Remove Old Fixture

Step 1: Turn off power

Shutting off the electricity is important to your safety. Locate the switchboard for the room you are working in and flip the switch. If you’re not sure where the switchboard is, check the basement or garage. It might also be in the front of the house or near the entrance.

Once you’ve flipped the switch for the room with the ceiling light, go back into the room and flip the switch a few times to make sure the power is off. Then, leave the light switch in the off position. Make sure you lock the circuit box or leave a note indicating that you are working. 

Step 2: Remove cover and bulbs

Use a stable step ladder to reach your ceiling light. Hold the cover, or the visible, outside piece of the light fixture, in place with one hand. Loosen the screws with a screwdriver in the other. (For heavy or large fixtures, it’s best to have someone else hold on while you work on the screws.

Once the cover is removed, unscrew the light bulbs and set them aside.

Step 3: Lower the fixture base

With the cover removed, you will be able to see the base–the part of the light fixture that attaches directly to the ceiling. Typically, the base will have tabs or nuts and screws securing it. Loosen the nuts or screws, then lower the base to access the wiring (In the rare case you’re unable to find the screws, search for the installation manual online. You can also take a picture of your base and bring it into our showroom – we’ll take a look and help you figure it out!)

Until you have disconnected the wiring, you will want to lower the base but not remove it completely—an easy way to do this is by securing it with painter’s tape or having someone else hold it in place.

Step 4: Disconnect the wires

Once you have uncovered the space behind the old light fixture, there should be a junction box where wires are connected and stored. Start by removing the caps or tape covering the wire connections. The caps will come off when twisted counterclockwise.

 Pro Tip: Take a picture beforehand so you can remember exactly how everything was put together. 

Part 2: Connect the Wiring

Step 1: Test voltage

Test each exposed wire by touching it with the tip of your voltage detector. 

If the voltage detector lights up, there is a current running through, and the wire is unsafe to touch. Double-check your circuit box and ensure the switch is still flipped. 

Once you’re sure there is no electrical current, you are safe to continue working with the wires.

Untangle the wires and detach the fixture from the ceiling completely. Either hand off to someone below or carefully carry it down the ladder.

Step 2: Check wires

Frayed wires can be hazardous -if there is any fraying on the end of the wires, trim them down with wire cutters. Then, strip off any insulation on the outside with wire strippers. You only need to strip about ½ inch of insulation for the wire connection.

Pro Tip: Check your new fixture’s installation recommendations carefully. If you’re installing a heavy fixture such as a ceiling fan or chandelier, you may also need to install an additional support in the ceiling. 

Step 3: Match and Attach

Electrical wires are color-coded. Black or red are hot wires, white is neutral, and green or bare copper are ground wires. A grounding wire sometimes connects to a grounding screw instead of another wire. Look for a matching wire in your ceiling for each wire in your fixture.

Twist together each matching wire. Either by hand or with pliers, hold the exposed ends side by side with one hand and twist with the other. (This is where your picture of the original fixture’s wiring comes in handy.)

Now that the wires are connected, it’s important to cover the exposed ends again. Screw the wire caps on by twisting clockwise over the connected ends until they hold the wires tightly in place. If your original fixture didn’t have wire caps, you can use electrical tape as well.

Make sure to check the owner’s manual for specific instructions—for example, you might have an extra red wire that connects to a black wire. If you don’t have any instructions, generally you will be fine with just matching the correct wire colors.

Part 3: Install New Fixture

Step 1: Replace junction box

With all your wiring safe and sound, the junction box is ready to be put back into place. Tighten the screws securely against the bracket until  Fold the wires up into the box so they will be hidden behind the ceiling light.

Step 2: Attach new fixture

There are several different ways your new light fixture base could attach to the ceiling—these are the most common ways. As always, check the owner’s manual for anything specific or unique about your light.

Securely attach the light base by positioning it over the mounting screws. Place a metal nut on each screw and twist by hand until they are tightly holding the base in place.

If the fixture has a mounting bracket, connect the mounting bracket to the junction box first, then hang the base over the screws.

If it’s a keyhole shape, adjust the base so the screws slide into the smaller grooves and then tighten the screws with a screwdriver until they are holding the base securely.

Step 3: Install light bulbs

Now that your base is set, it’s time to add the light bulbs. Make sure you have the correct wattage—the fixture typically indicates its maximum wattage on the package or owner’s manual. 

When choosing which bulbs to use, the lower the wattage the safer. Most light fixtures are safe with up to 60 watt incandescent bulbs. You may also want to consider more eco-friendly choices, such as CFL or LED bulbs. These options have lower wattage but produce the same amount of lighting, saving you money on electricity in the long run.  

Test the bulbs by turning the electricity back on—flip the switch on the circuit breaker then turn on the room light switch. If it is flickering, dim, or not turning on at all, turn the electricity off again and check everything—look for loose connections or mismatched wires. If your lights are bright and solid, you are ready for the final step.

Step 5: Attach cover

Flip the light switch and circuit breaker back off before installing anything else. Take your light fixture’s shade, cover, or top and climb back up the ladder. Attach it to the base by twisting screws or attaching pieces until everything is tight and secure. If it’s a hanging light, make sure it’s at the proper height before finishing your work. Every light has different connecting components, so check your owner’s manual and just make sure it’s snug.

And there you have it, your guide for installing a new, updated ceiling light. Now that you know how to install it, make sure to visit our showroom to choose the perfect fixture for your ceiling!

Filed Under: 2023, Buying Guides, Ceiling Lights, Styles and Trends, Wellness & Safety

Kitchen Light Fixtures 101

Kitchen Light Fixtures 101

by admin · Feb 23, 2023

Whether you’re building or renovating, understanding your lighting options and making smart choices will completely transform the way your kitchen looks and feels.

Keep in mind – your kitchen will look best with multiple types of lighting! One light overhead just won’t do the room justice – and it probably won’t give off enough light to cook safely. Your best bet is to go with a mix of ambient (overhead, general lighting) and task (specific to place or purpose) lighting to make your kitchen both beautiful and functional.

 Here’s a quick guide to the different types of light fixtures you’ll find in kitchens.

Pendants

Pendant lights hang down from the ceiling, and typically only have one bulb. They’re most often used over countertops like a kitchen island or peninsula. Pendants come in a huge variety of colors, shapes, and styles.

Recessed

Many modern kitchens now include recessed lighting. Recessed lights give off great light without having a fixture in the ceiling that blocks the view and needs dusting. Recessed lights can be used all over the ceiling to create general ambient light, or placed over countertops to create task lighting for chopping and cooking.

Chandelier

While this look may not be for everyone, for those who love having some extra sparkle in their kitchen, a chandelier is an excellent choice. A chandelier is a light fixture that hangs down from the ceiling and has multiple lights that shine out and around the room.

Skylight

Okay, so this might not be a light fixture, but this type of kitchen light is unconventional in the best way possible. When combined with other light fixtures, a skylight makes a stunning statement that earned it an honorary place on our life. A skylight is, essentially, a window in the ceiling or roof of the house. It lets natural light flood into the room, filling it with bright white light. While they may only be “useful” during the day, they’re a beautiful addition to any kitchen. 

Under-Cabinet Lighting

These tiny fixtures pack a powerful punch! Mounting lights underneath your wall cabinets will brighten your countertops, making it an easy place to prepare food. They’re also a great addition for late-night snacking – they give off enough light to see in the kitchen without having to be blinded by the full power of the ceiling lights. Under-cabinet lights come in a lot of shapes and sizes – you can get small, individual lights like these, or strips of LED lights that give off an even glow. Many are battery-powered, so they’re easy to install – but you can also have them hard wired to a switch (our favorite option!)

Cove Lighting

If your kitchen has a beautiful coved ceiling like this one, adding a small strip of inexpensive LED lights around the interior of the structure can create a beautiful, high-end look for next to nothing. 

Ceiling Fan

While it may not be the first thing you think about when you hear “kitchen lighting” – a ceiling fan can be a great choice for the kitchen! It’s most commonly found in kitchens with high ceilings or in large great rooms (spaces that combine kitchen, dining, and living areas) to help keep air circulating and comfortable across the larger space. It’s also the perfect option for outdoor kitchens to help keep insects at bay while you’re preparing and enjoying your meal.

———-

Regardless of which fixtures you choose for your kitchen, as long as you make sure that your countertops are well-lit and the light levels are comfortable for the way you use the room, you should be in great shape to enjoy your kitchen for years to come. 

If you’re not sure which fixtures would be best for your kitchen, or if you need help arranging your fixtures in the best positions for your space, stop by our showroom and chat with one of our lighting specialists! We’ll give you expert advice tailored to your room and help you get on your way to lighting your home just the way you like it.

Filed Under: 2023, Accent Lighting, Ceiling Fans, Ceiling Lights, Chandeliers, Kitchen Lighting, Lighting Types, Recessed Lighting, Styles & Trends, Styles and Trends

How to Safely Install a Ceiling Fan

How to Safely Install a Ceiling Fan

by admin · Jan 25, 2023

Installing a new ceiling fan is a cheap way to save on energy costs all year without compromising on comfort. In the summer, ceiling fans cool down the house by creating a breeze. In the winter, they help circulate the heated air to warm the whole room evenly. 

Putting in a ceiling fan is a win-win for your comfort levels and your budget – and it’s a pretty simple DIY project for homeowners. Plan on giving yourself a few hours (depending on the type of fan and your experience level with lighting DIYs), and grab a friend that can help you hold things in place while you work.

If you’re buying a ceiling fan new, it should come with thorough installation instructions. We always recommend following those instructions exactly to be sure that your fan is installed safely and properly. If you’re installing a secondhand fan, you may be able to find the installation guide online by searching with the model number on the fan. Either way, we’ll walk you through the basic steps here so that you can prepare. 

1. Preparation

Before you break out your tool belt, make sure you have a good plan in place. There’s nothing worse than being in the middle of a project and realizing you don’t have everything you need to complete the task.

Tool Checklist

Before you take on a ceiling fan installation project, make sure you have all the tools you need so you don’t have to rush off to your local hardware store for a last-minute purchase. To install a ceiling fan you’ll need to have a:

  • Voltage Tester
  • Ladder
  • Measuring Tape
  • Screwdriver
  • Ceiling Fan-Rated Junction Box
  • Fan Brace
  • Wire-Cutter/Stripper
  • Light Bulbs
  • Globes/Shades if they aren’t included
  • An extra-long downrod if you’re installing on a sloped ceiling
  • Ceiling Fan and Kit

Choosing the Right Fan Size

Measure the room you’re working in before you start. Not all fans are created equal, so pick one that will fit. Use the following guidelines to help. 

  • For rooms smaller than 75 square feet (like bathrooms), pick a fan with blade spans of less than 36 inches.
  • Blade spans between 36 and 42 inches are ideal for rooms up to 144 square feet. 
  • A 44-inch span is perfect for rooms up to 225 square feet, like a dining room.
  • For rooms that are 225 square feet or larger (a large living room, for example), you’ll need a fan with a 50 to 54-inch blade span.
  • The more space between the ceiling and the fan, the better! The ideal ceiling fan height is 8-9 feet above the ground. 
  • If your ceiling is less than 8 feet, you’ll most likely need to install a flush-mount fan (no downrod).
  • High pitched ceilings typically require you to buy an extra-long downrod (so that the blades won’t hit the sloped ceiling), so check your ceiling height and angle before choosing your downrod.

Pro Tip: Once your fan is installed, the tips of the blades should be at least 30 inches from the walls, and the bottom edges of the blades should be at least 7 feet above the floor. 

Other Important Tips

  • Ceiling fans are heavy! They need to be anchored properly to an electric ceiling box designed to hold the weight of the fan. Inspect the electrical box to ensure it’s fan-rated. There should be an inscription on the box to indicate this. If it’s not, you’ll also need to purchase a fan box before you get started.
  • Check to make sure the light switch you’re using is wired appropriately for the fan. If it isn’t, you may need to call a professional to get the job done.
  • Check the ceiling joists for any wiring or plumbing pipes that may be in the way.
  • If you’re adding a new fan where one didn’t exist, check local building codes to determine if you need a permit.
  • Always check your installation guide for any additional requirements that are specific to your fan. For some expert help choosing the perfect fan for your space, give us a visit or a call and we’d be happy to help.

2. Safety

Now that you’re ready to begin, head out to your circuit breaker and turn the power off for the room where you’ll be installing your fan. Also, make sure all of the wall switches in the room are safely in the “off” position. Do not rely on a wall switch alone to protect you from electrical shock! Always use a voltage tester to be sure the power is off before handling wires.

Pro Tip: Place some electrical tape over the switches you’ve turned off on the circuit breaker. This will prevent anyone from switching it back on while you’re working.

3. Remove Your Old Fixture

Let’s get started! First, you’ll need to take down the existing fixture. Most fixtures have easy-to-find attachment points, like screws or twist-off caps. Remove accessories like light bulbs, shades to get down to the base of your fixture, then unscrew the base from the ceiling.

If you’re removing an existing ceiling fan, remove the light bulbs and globes first. Then, take down the light kit (if needed – some fans have them, some don’t). Unscrew and remove the fan blades next. At this point, you may need to enlist a helper as the full weight of the fan base and motor can be heavy. Pull off the canopy (metal cover at the base of the fan). The last step is to remove the mounting bracket with a screwdriver!

Once you have the base of your fixture dropped away from the ceiling, unscrew the wire nuts connecting it to the electrical box. Be sure to test the wires with your voltage tester first!

4. Install a Fan Box

Before you start, check your existing electrical box. If it isn’t rated to support the weight of your fan, you’ll need to install a new one. To see if your existing box is rated to hold a fan, just take a look at the label! If you can’t find a label, err on the side of caution and get a new one. 

You’ll have to do a little bit of homework here to figure out what will work best for your project. Fan boxes are easiest to install if you have open access, like in the attic or an unfinished ceiling. If you won’t have easy access you may need to widen your drywall hole a little, but you can usually find a brace that will slip through the existing hole. 

Take a look at your rafters to determine the best way to install your fan box. Fan boxes can be attached directly to the rafter with a side bracket. If your new fan won’t be right next to a rafter, look for a brace that will span the space between two rafters. These braces can be a little trickier to install through a small hole in the ceiling, but they’ll give you a lot more breathing room when it comes to getting your fan box in the right place. 

5. Install the Mounting Bracket

To secure the mounting bracket to the fan box, start by threading the wires through the mounting bracket. If the fan has a slide-on bracket, leave the bolts on the junction box, slide the bracket over the mounting hardware, and tighten the screws. For fans without a slide-on bracket, place the bracket over the mounting bolts that poke through the bracket. Then, secure it using the provided nuts. If your fan is a flush mount, pull the wiring through the canopy (the part that covers the wiring/mount bracket) and skip to step 7.

6. Install the Downrod

To set the downrod, you’ll want to find a flat work surface. Slip the canopy onto the downrod and pull the primary wires through the hollow downrod. Then, connect the downrod to the fan base. With the downrod and base assembled, attach the other end of the downrod to the mounting bracket. 

7. Wire the Fan

Next, it’s time to wire! Hang the downrod – or canopy, if you’re installing a flush mount fan – on the hook on the mounting bracket. If there isn’t a good place to hang it, phone a friend to hold the fan up for you to free up your hands while you connect the wires. 

Before you start, check to make sure all your wiring (and the wire nuts) will fit in the ceiling. Use your wire cutters to trim down any wires that won’t. This will also keep them from vibrating against the canopy when the fan is on. Use wire strippers to expose the copper of the wires on the new ends. 

Connect the corresponding wires using the provided wire nuts. Your installation guide will have a diagram to follow, but, generally speaking, the fan’s green wire connects to the ground wire, the fan’s black motor wire connects to the black supply wire, and the fan’s white wire connects to the white (or neutral) supply wire. 

Double-check your work against the diagram, then gently push the wires into the junction box. Lift the fan into position, then clip it to the mounting bracket and secure the screws.

Pro Tip: Some fans come with additional wires for extra features, like having a separate switch for the light and fan. If your switches or wires don’t match the diagram, you might need to check in with an electrician or a lighting specialist at our showroom to help you get things set up correctly.

8. Blades and Bulbs

Now it’s time to install the fan blades. Every fan is a little bit different – but most fans will have an arm or bracket that you’ll need to attach to the blade and then to the base using a screwdriver. Some fans have quick-install blades that speed up the process using keyhole slots that slip over the fan’s mounting screws and lock into place with a little tug. 

Some fans have reversible blades – so make sure you’re checking each time that you have the correct side pointed down!

By now, you should be seeing the light at the end of the tunnel – so let’s install the bulbs! For fans with a light kit, refer to your guide to ensure everything goes in place correctly. Generally, you’ll just need to install the shades, globes, or light cover. If your fan did not come with bulbs, make sure the bulbs you install have the correct base type and wattage 

If your fan came with a remote, don’t forget to install the remote control holder!

9. Lights… Fan… Action!

Last, but not least, it’s time to test out your new ceiling fan! Go back to your circuit breaker and turn the power back on. Try switching your fan and lights on and off using the light switch or remote control. Test all of the speed settings to make sure your fan is secured properly and doesn’t wobble or rattle.

Most of the time, installing a ceiling fan is a pretty straightforward DIY project. Occasionally, an odd issue can crop up due to things like old wiring. If you run into any trouble, be sure to give us a call right away, or call an electrician that can help you troubleshoot the issue.

—

Congratulations DIY master! Now that you’ve successfully installed your new ceiling fan, get ready for a fresh breeze to blow your way–and some savings too. With all that extra cash blowing around, come visit us and we’ll help get you started on your next project. 

—————————-

DISCLAIMER: Be sure to follow all the manufacturer’s installation instructions and take all recommended safety precautions. Check before installing to see if you need a permit and be sure all building and electrical codes are observed. If you have any questions or are unsure about installing the fan yourself, contact a licensed electrician or Pine Grove Lighting for more help.

Filed Under: 2023, Ceiling Fans, Ceiling Lights, How to, Informational, Wellness & Safety

Timeless VS. Trendy: Which Works Best In Your Home?

Timeless VS. Trendy: Which Works Best In Your Home?

by admin · Jan 7, 2021

Keeping up with trends, whether commercially or only as an observer, can be a fun hobby! There’s so much variety, beauty, and class in this world. However, trends in fashion, décor, and even lighting, revolve quickly. If you’re thinking of replacing a more permanent part of your home, such as the flooring, plumbing, or lighting, it’s tricky to be trendy and timeless at the same time.

So how do you decide? Should you choose the latest look, with all the “Ooh”s and “Ahhh”s it’ll bring? Or should you be conservative and avoid something you’ll regret in 5 years? After all, tiny details can date a home. You know, wallpaper from the 70’s, pink tile in the 80’s, burgundy and forest green from the 90’s, bronze and faux finishes from the early 2000’s…

There isn’t one right way to go about this, nor is there one easy answer to the “trendy vs. timeless” debate. However, here are a few things to consider.

It’s Not All or Nothing

You may love some of the styles that have withstood the test of time: subway tile, herringbone (fabric and flooring), or wood floors. That’s great! On the other hand, that doesn’t mean that you can’t also incorporate this year’s hot paint colors and some trendy macramé hangings into your décor as well. Don’t try to decide everything at once, and don’t base all your decisions off of one piece of your home.

Consider Your Resale Plans

There are some cases when it’s better to choose trendy décor and finishes, even if the current trend is not your personal favorite. If you’re building a new home, remodeling, or flipping a home with any intention to sell soon, go trendy. Homes that are on trend show well and sell faster.

Avoid Over-Decorating

Though you could argue that “minimalism” is a trend in itself, we’re convinced that good use of space is timeless. Though it can be tempting to fill every shelf or cover every wall with your latest finds, an over-decorated, crowded space diminishes the artistic effect of any style. In addition, it’ll be easier to update your look later if you have few, carefully chosen accent pieces that can rotate with the next trend.

Be Smart About Trendy

If you’re like most people, you probably don’t have unlimited time and funds to remodel the kitchen or buy a new couch every time popular trend takes a new direction. However, there are plenty of simple, cost-effective ways to make your space trendy and new. Here’s a list of our favorite ideas!

1. Change an indoor paint color. Indoor paint runs its course in about 5 years, so it makes sense. You could even start with a small room… less time, big reward!

2. Rotate your rug or change it altogether. Rugs have a natural knap to them depending on how they are woven. A quick rotation may surprise you with a significant difference.

3. Update your throw pillows on the bed and couches. It’s a quick, cost-effective change!

4. Especially during the winter, add a plant or some kind of earthy décor element to bring a natural, refreshing feel to your space.

5. Switch out some art. Frames may be pricey, but prints usually aren’t! Buy a new family photo, modern print, or custom piece of art to freshen up your frames

6. Replace a key lighting fixture. In addition to updating your look, switching to new bulbs will save you money on your utility bill. Check out our catalog for some good recommendations!

7. Buy new dish towels or dinnerware. An extra pop of color can change the atmosphere in the kitchen or add some extra fun at dinner. 

Make Your Home Your Own

Trends will come and go… And traditional styles? Even there, there’s a ton of variation! Contemporary. Transitional. Rustic. Vintage. Urban. Eclectic… no matter the style, take the time to create a home environment that speaks to you. If it suits your needs and appeals to your unique style, it’ll be timeless. Best of luck from Pine Grove Lighting in your decorating adventures!

Filed Under: 2020, Ceiling Lights, Styles & Trends

« Previous Page

Copyright © 2025